
Residential Garage Door Sensor Installation: Complete Homeowner’s Guide
Garage door sensors are one of the most critical safety features in a modern home. These small devices, usually mounted a few inches above the ground on both sides of the garage opening, prevent accidents by detecting obstructions. When the sensor beam is interrupted, the garage door automatically stops or reverses, protecting children, pets, and property.
In this detailed guide, we’ll cover everything about residential garage door sensor installation, including how sensors work, common issues, DIY setup vs. professional installation, and tips for long-term maintenance.
What Are Garage Door Sensors and Why Are They Important?
Garage door sensors, also known as photo-eye sensors, use infrared technology to detect objects in the path of a closing door. If the beam between the two sensors is blocked, the system sends a signal to stop or reverse the door.
Key benefits of garage sensors:
Prevent accidents and injuries.
Comply with modern garage door safety standards.
Extend the life of the opener system by reducing strain.
Provide peace of mind for homeowners.
Since 1993, U.S. law has required all automatic residential garage doors to include safety sensors.
Signs Your Garage Door Sensors Need Replacement or Repair
Just like springs and openers, sensors can fail over time. Look for these warning signs:
Door Won’t Close Completely – A misaligned or dirty sensor may prevent full closure.
Blinking Sensor Light – Indicates poor alignment or wiring issues.
Unresponsive Door – If the opener doesn’t react, the sensors may be disconnected.
Frequent Reversals – Door goes back up even without an obstruction.
Physical Damage – Broken brackets, cracked lenses, or loose wires.
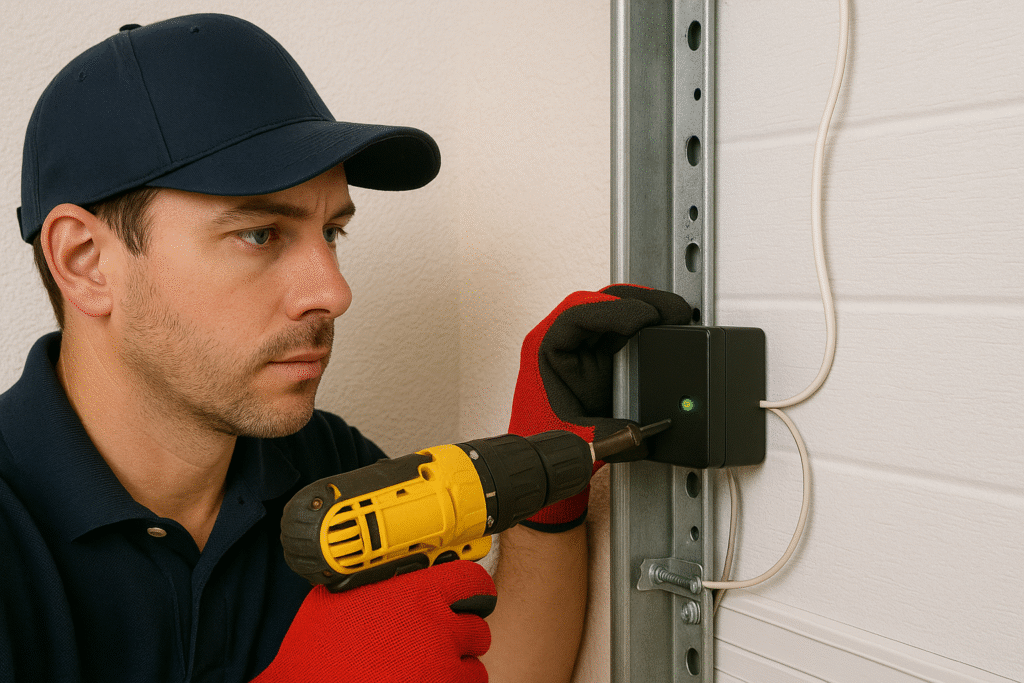
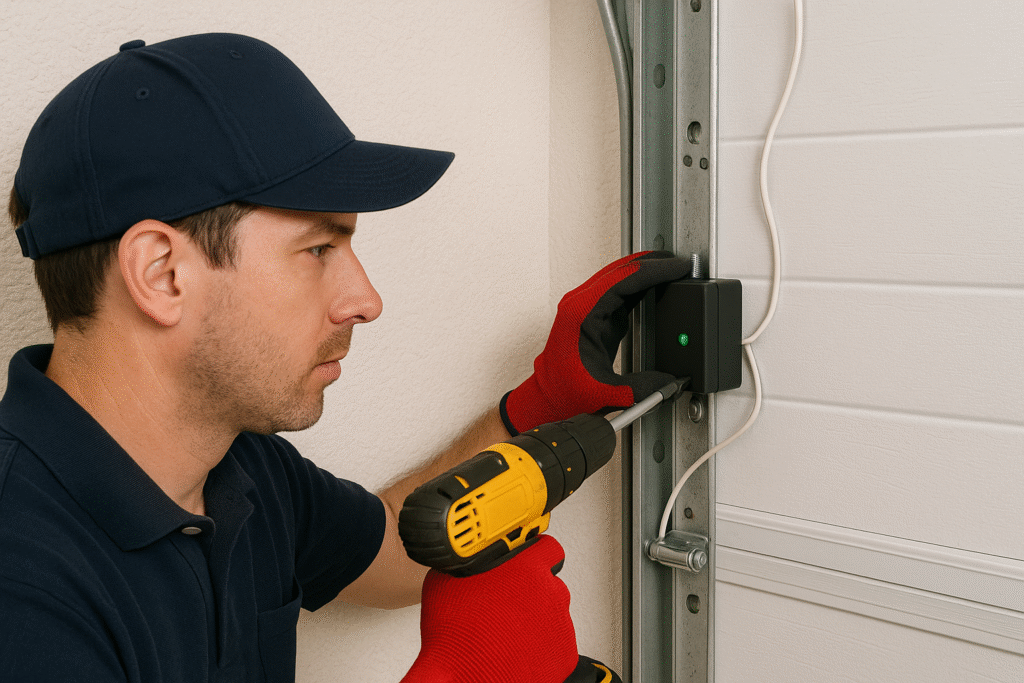
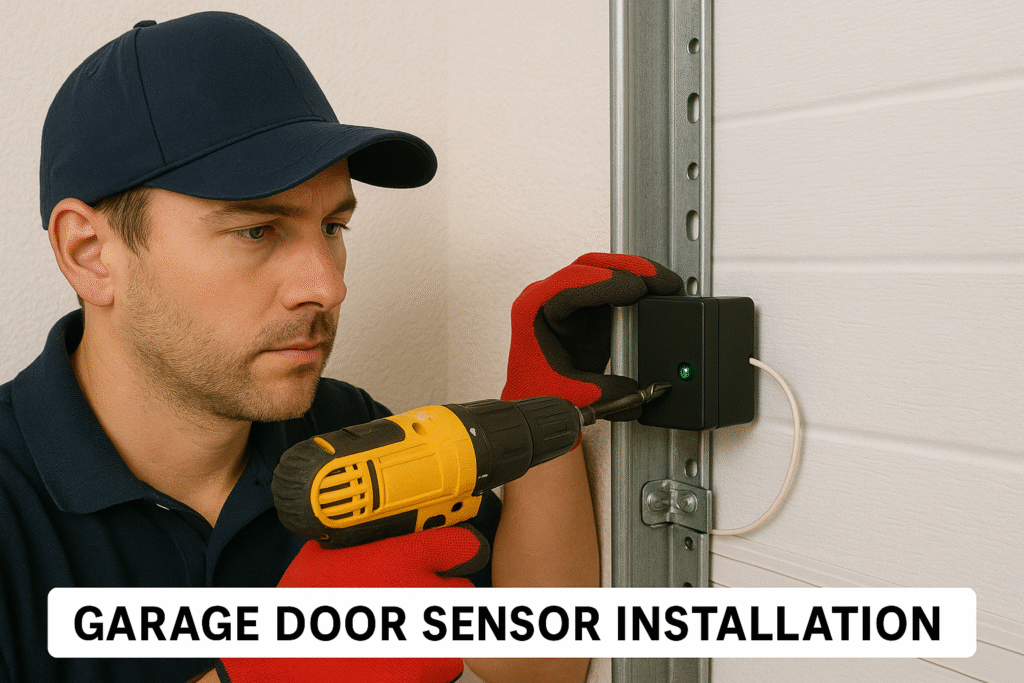
DIY Garage Door Sensor Installation
Installing or replacing garage door sensors can be a straightforward project for homeowners comfortable with basic tools.
Tools you’ll need:
Screwdriver set
Level or laser tool
Mounting brackets
Wire strippers and connectors
Electrical tester
Steps for installation:Turn off power to the garage opener to avoid electrical hazards.
Mount sensor brackets on each side of the garage opening, 4–6 inches above the floor.
Attach the sensors to the brackets and face them directly at each other.
Run wiring from the sensors to the opener unit, ensuring secure connections.
Align sensors using a level—misalignment is the most common cause of malfunction.
Reconnect power and test by closing the door with an object in the path.
⚠️ Safety Tip: Always test sensors after installation to confirm they stop the door when obstructed.
When to Call a Professional Technician
While DIY is possible, some situations require expert help:
Complex wiring issues.
Persistent misalignment despite adjustment.
Damaged opener circuit board.
Need for a full opener replacement.
A certified garage door installer ensures proper calibration, secure wiring, and compliance with safety standards.
Common Garage Sensor Problems and Fixes
Even after proper installation, garage door sensors can develop issues. Here’s how to troubleshoot:
Dirty Lenses – Clean sensors with a soft cloth. Dust or spider webs can block the beam.
Misalignment – Realign sensors until indicator lights show solid green.
Loose Wiring – Check for disconnected or frayed wires.
Sunlight Interference – Install sun shields or reposition sensors to avoid direct sunlight.
Faulty Unit – If lights don’t turn on at all, replacement may be necessary.
Cost of Garage Door Sensor Installation
The cost varies based on whether you DIY or hire a technician:
DIY sensor kit: $30 – $80
Professional installation: $100 – $200
Full opener replacement with sensors: $300 – $600
Though DIY is cheaper, professional installation provides long-term reliability and a service warranty.
Safety Precautions for Garage Sensor Setup
Garage sensors are directly tied to safety, so proper handling is essential:
Always cut power before wiring.
Install sensors at the correct height to detect pets and children.
Test sensors monthly to ensure functionality.
Replace both sensors together to maintain compatibility.
Never bypass or disable sensors, as it creates safety hazards.
Maintaining Your Garage Door Sensors
Like any other component, sensors need care to last longer.
Maintenance tips:
Clean lenses every few months.
Inspect wiring during seasonal checks.
Tighten brackets to prevent vibrations from knocking sensors out of alignment.
Lubricate moving garage parts to reduce opener strain.
Schedule annual professional inspections.
Residential Garage Door Safety Standards
Modern garage door systems must meet safety regulations, which include:
Automatic reversal systems (sensors and force detection).
UL 325 compliance for openers and safety features.
Installation by licensed professionals for warranty validity.
By ensuring your sensors are properly installed, you stay compliant and protect your household.
Conclusion
Residential garage door sensor installation is a vital step in ensuring home safety and garage door reliability. Whether you choose to install sensors yourself or hire a professional, the key is proper alignment, secure wiring, and regular maintenance.
Well-installed sensors prevent accidents, extend the life of your opener system, and provide peace of mind every time you use your garage door.

Pingback: Automatic Garage Door Repair: Fast, Reliable Service -